How I did it – Part 4
Another Tutorial! Don’t worry, I’ll get back to the photo posts soon!
I’ve had another request for a tutorial. This time someone would like to see how I convert to black and white. Believe it or not, there are TONS of ways to convert an image to black and white. However, there is one particular method that I use often. I believe I got it from a Scott Kelby photoshop book for CS2 purchased on Ebay. It’s a very easy process that makes for a great action.
Here we go…..
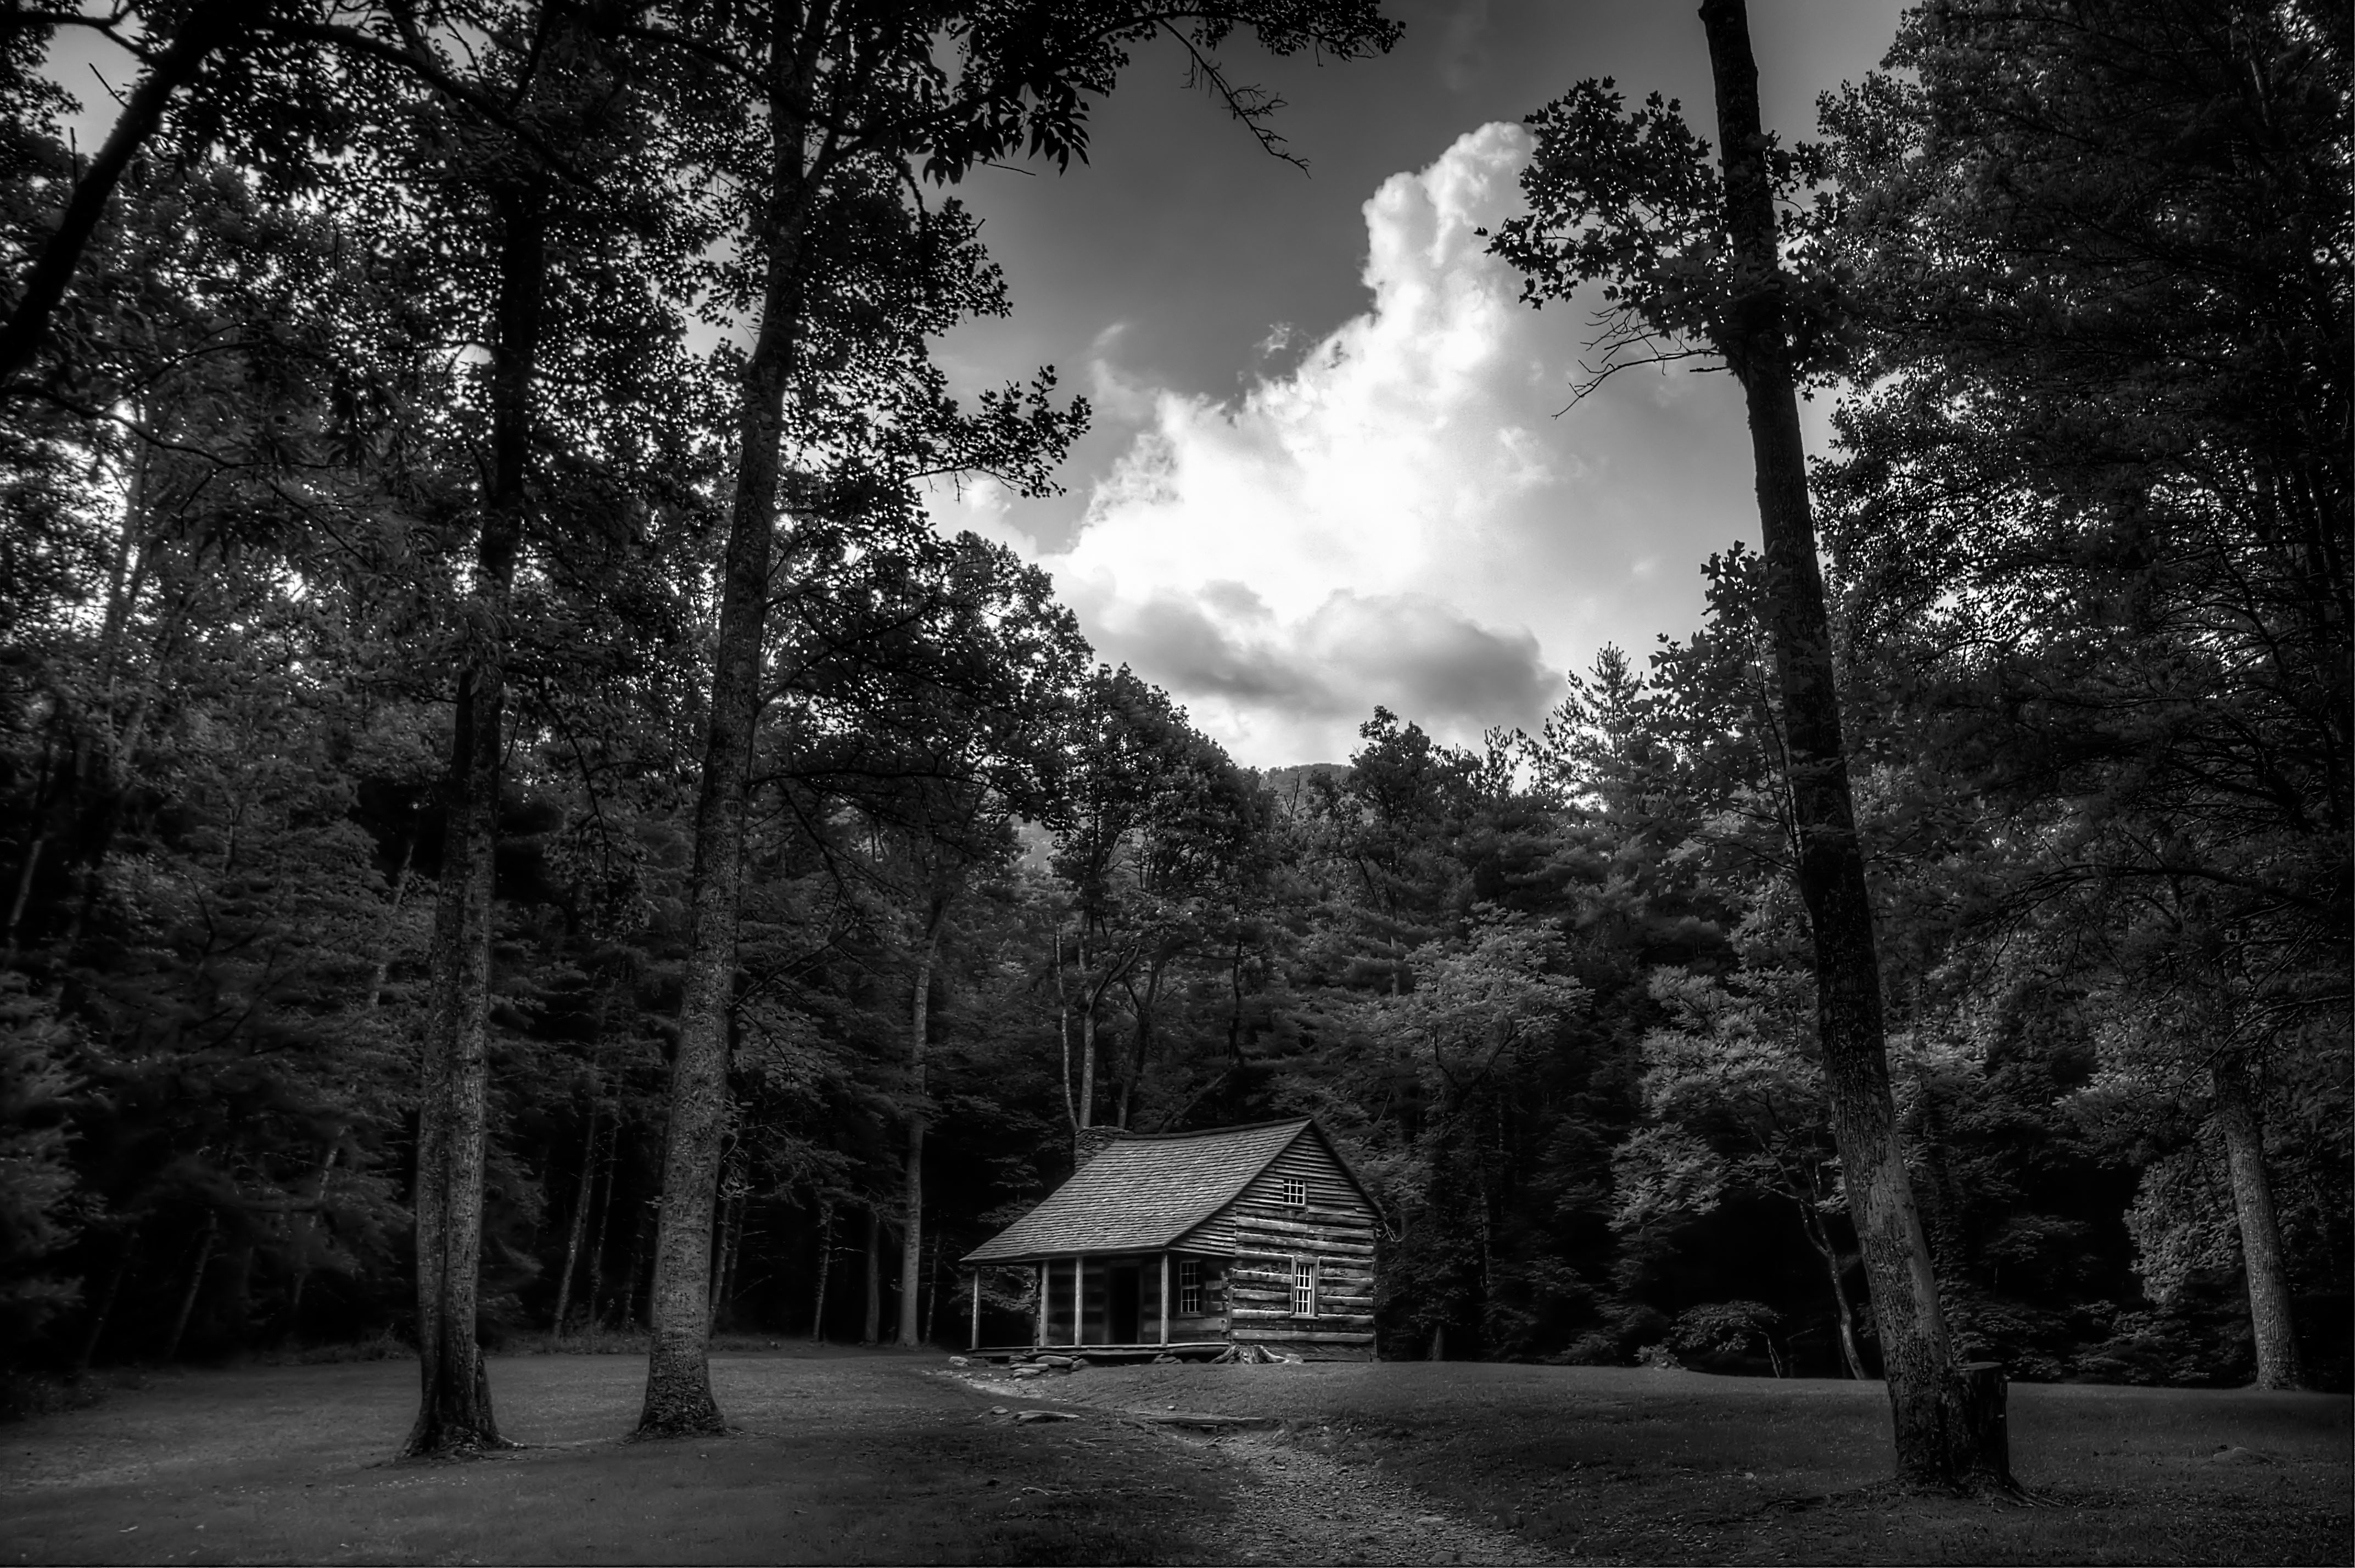
Here is what we are starting with:
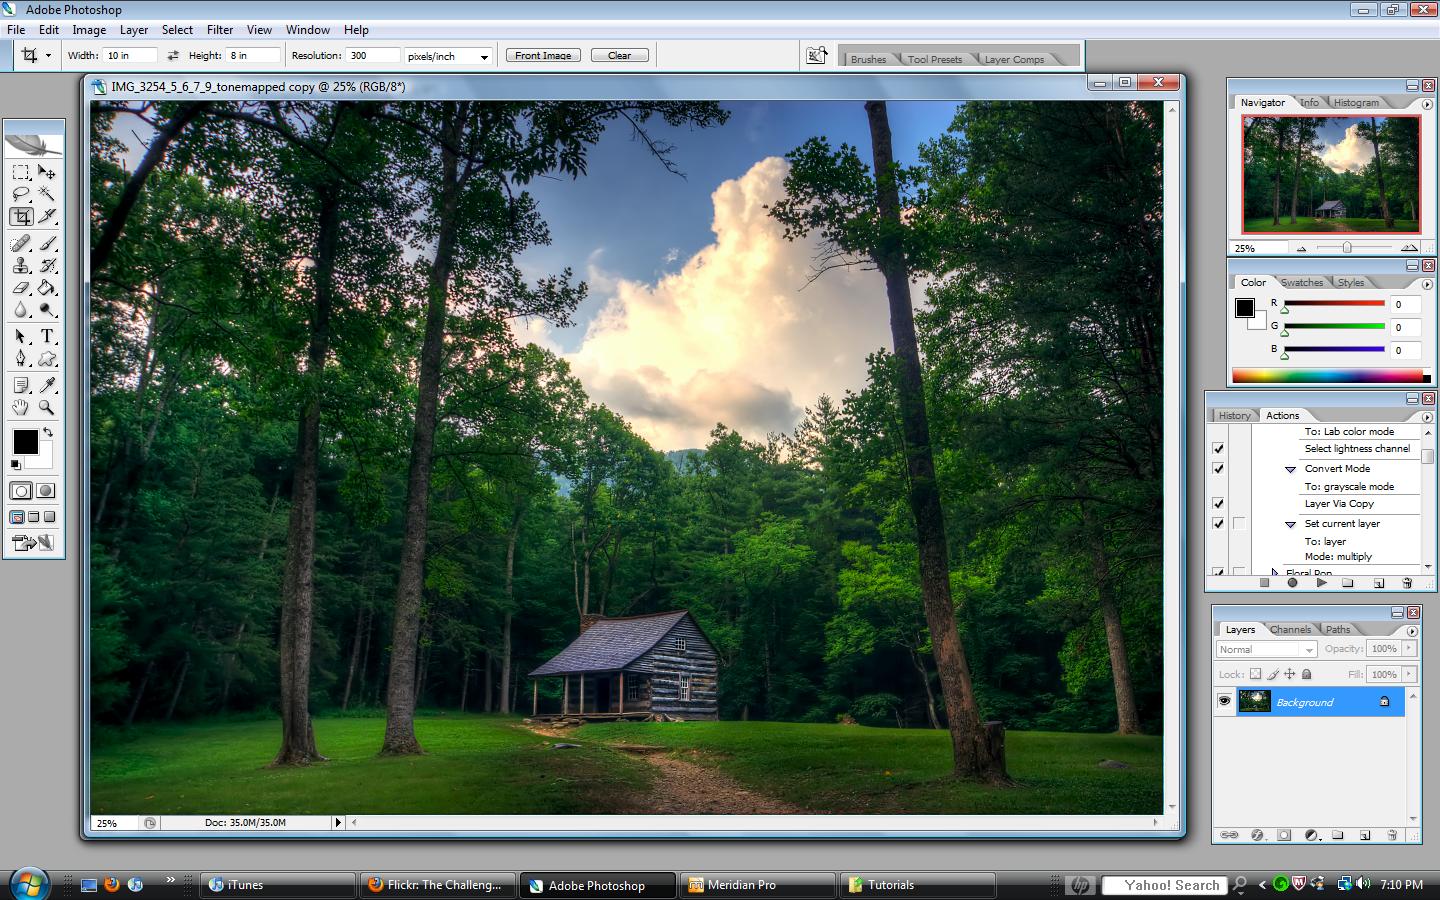
Now, this is an HDR image and I am already finished with my normal processing. You can check out my other tutorials to see those steps. So now I decide I’d like to see it in black and white.
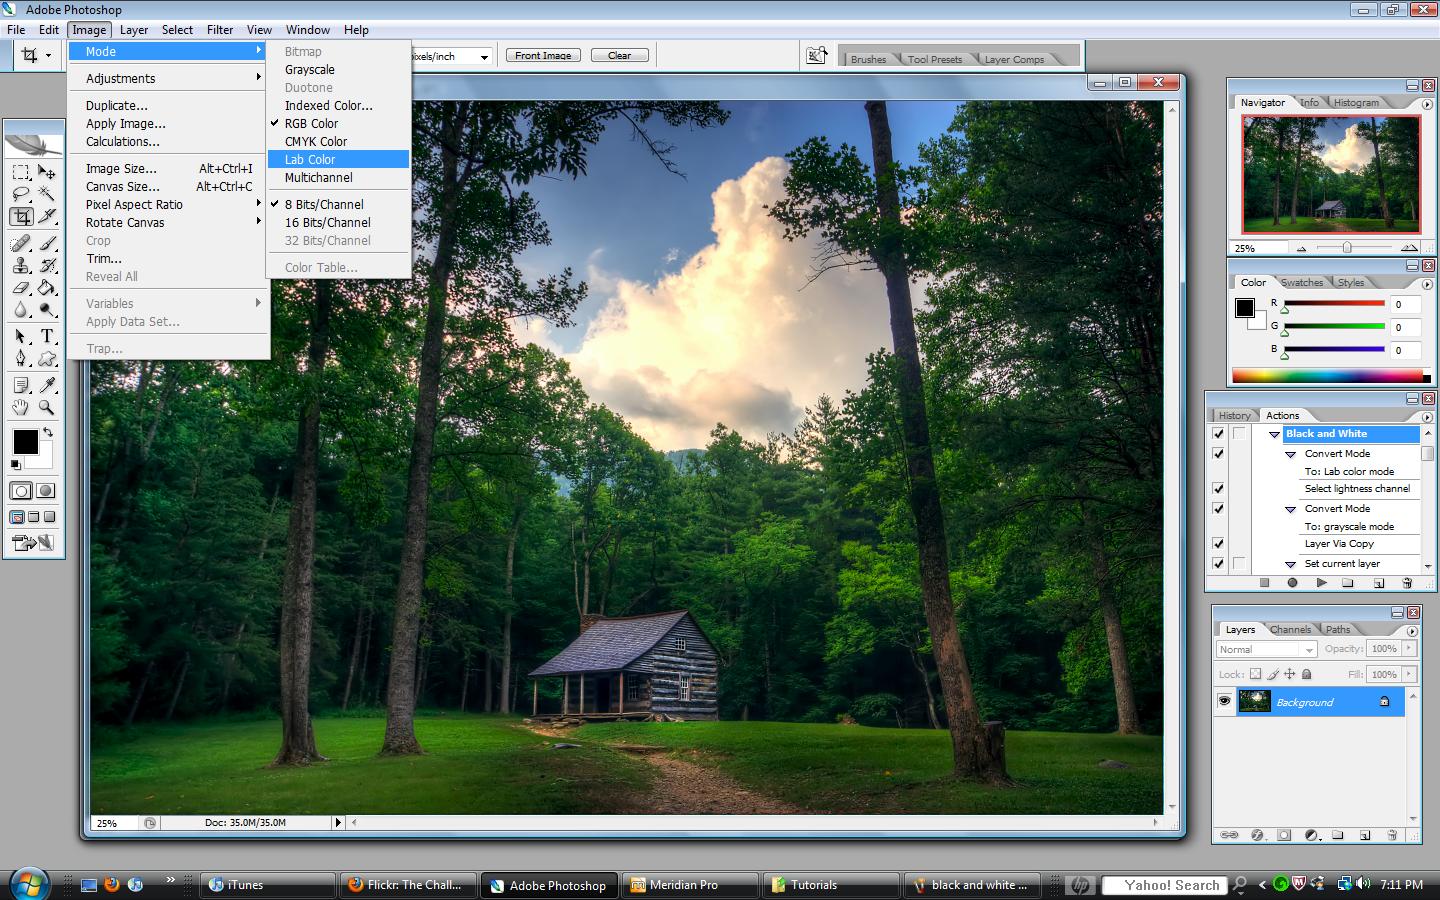
First step is to convert the image to LAB mode — Image, Mode, Lab Color:
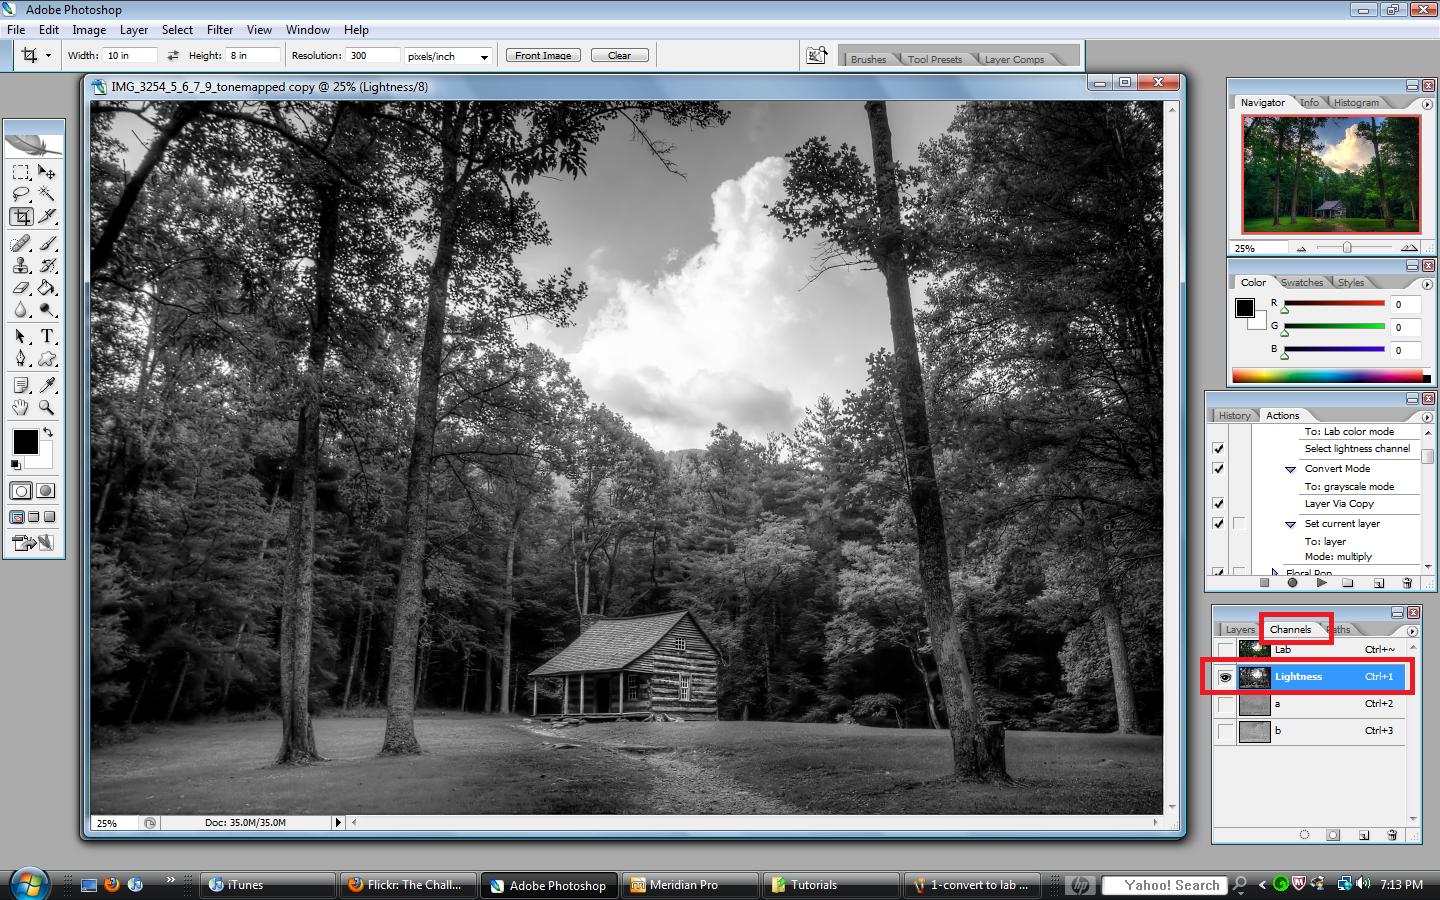
Next, in the “Layers/Channels/Paths” box, click on the “Channels” tab. You’ll see all the channels are selected, select the “Lightness” channel (which turns the others off)
With the “Lightness” channel selected, we want to convert it to grayscale — Image, Mode, Grayscale
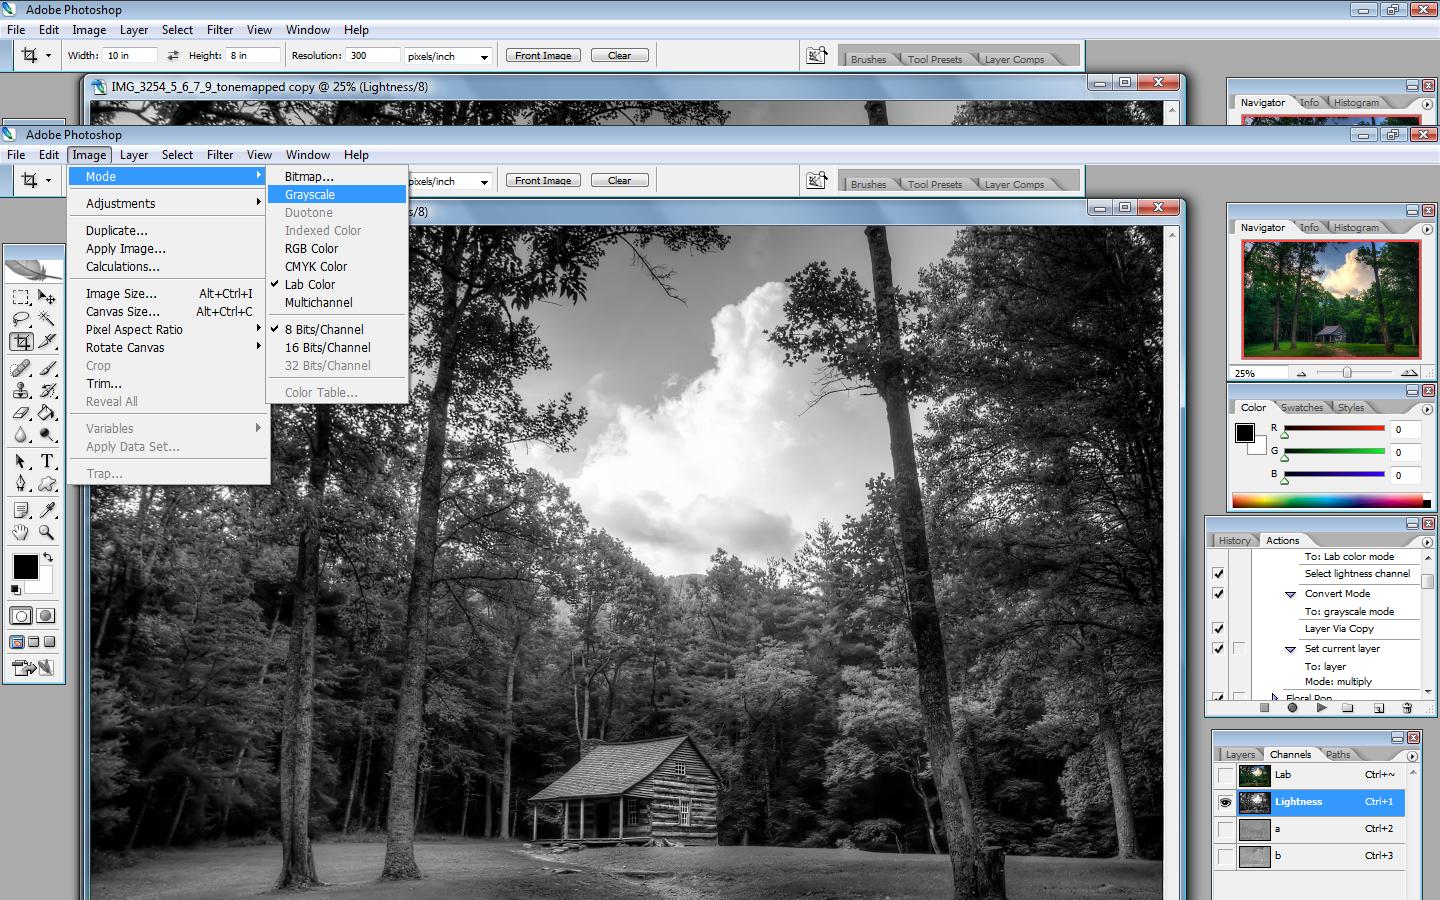
It will ask you if you want to discard the other channels, say yes:
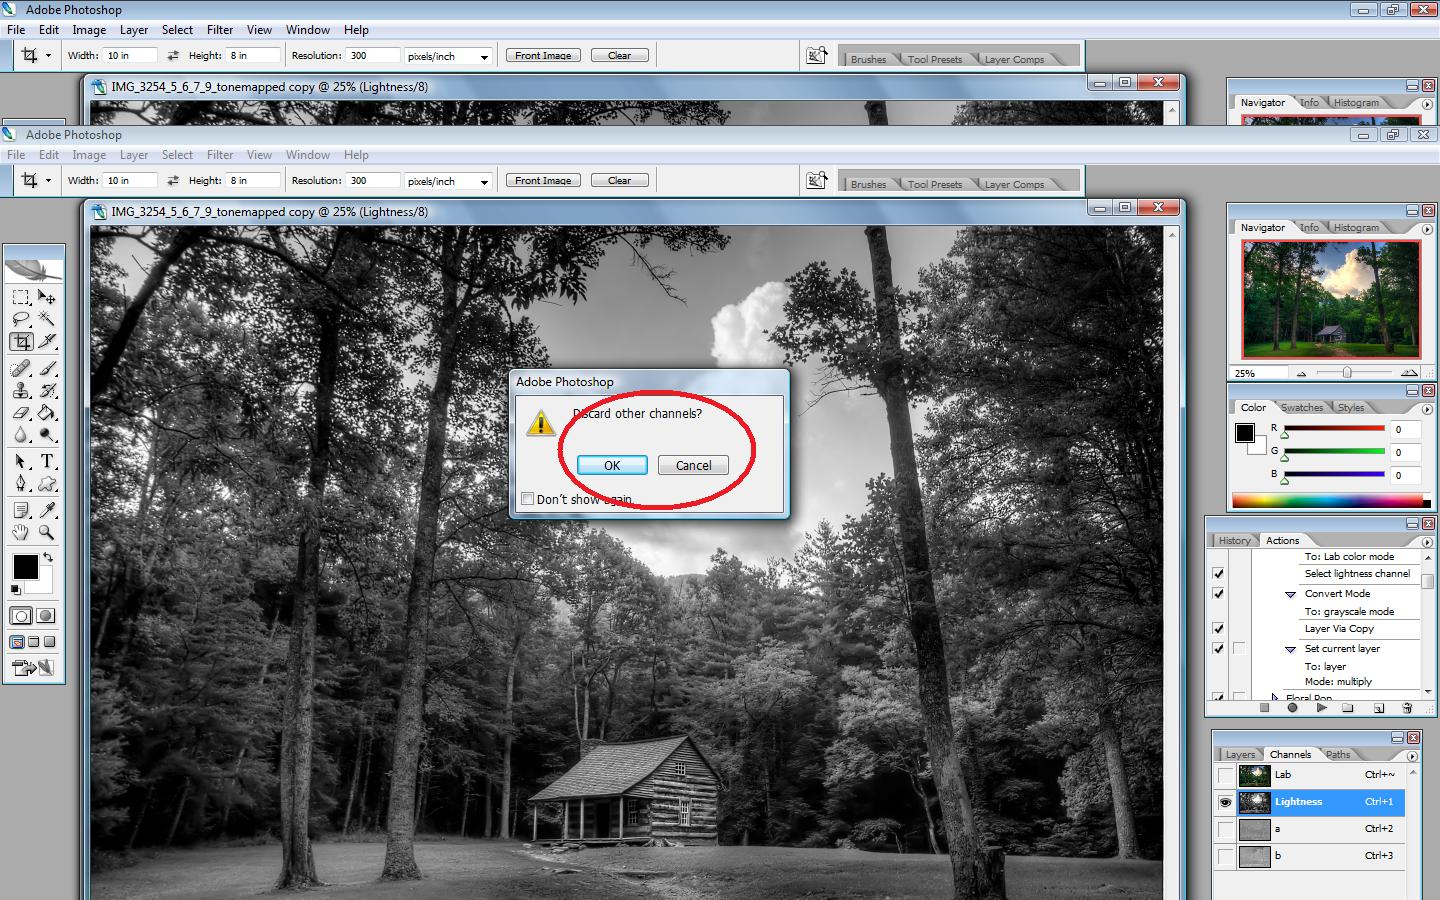
Now, back on the “Layers” tab, do a CTRL+J. This duplicates the layer. Put that top layer in “Multiply” blend mode and adjust the opacity to taste:
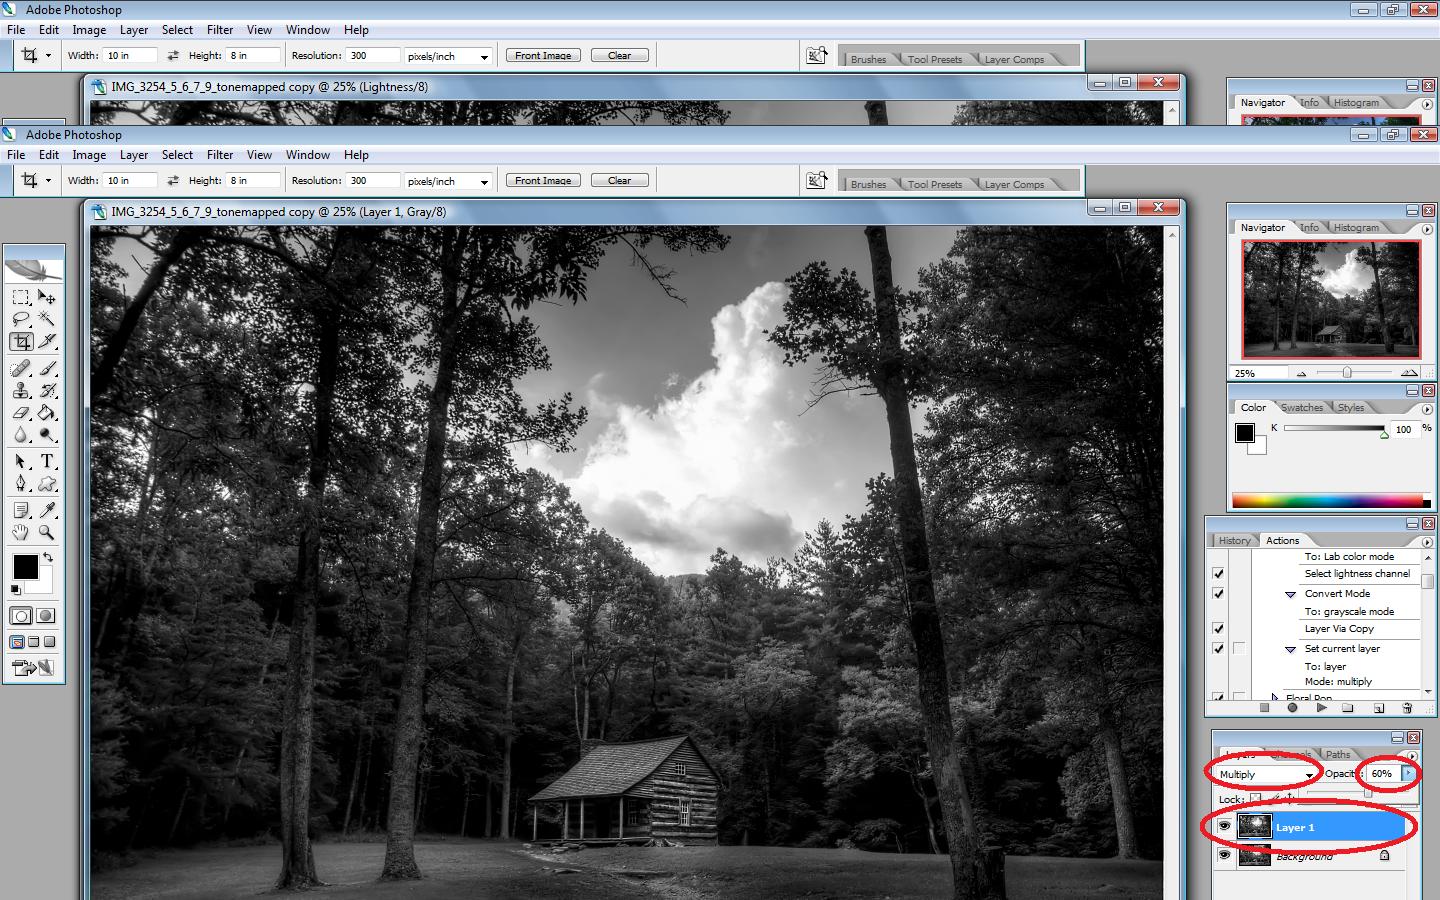
And that’s it! Black and white complete. If you write this as an action, leave the opacity at 100%, that way you can adjust it differently for each image you convert.
An alternate to changing the opacity, you could add a layer mask:
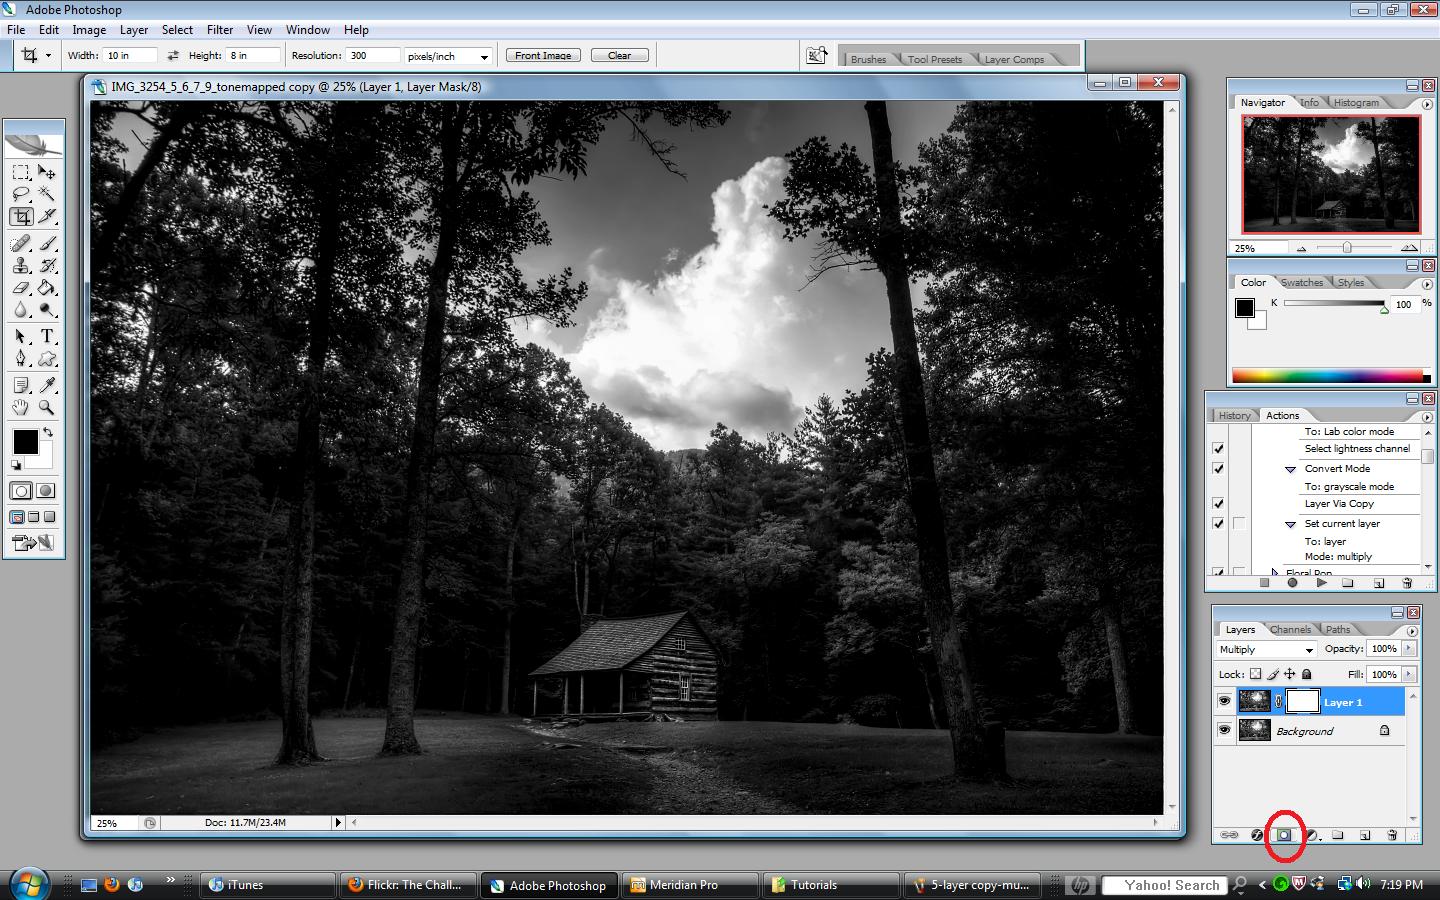
and then grab a soft black brush:
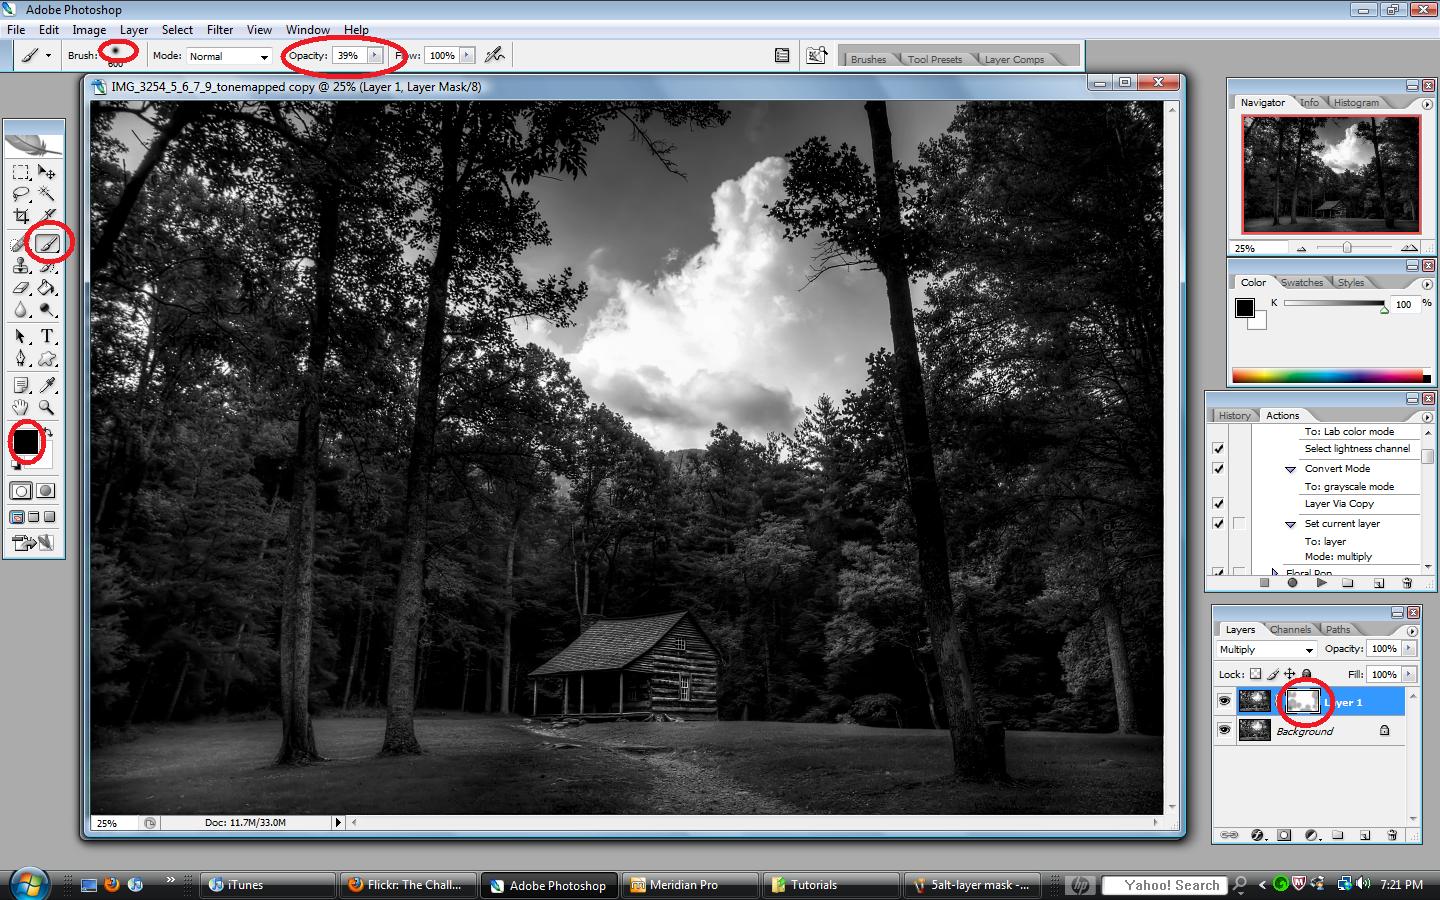
And paint the areas that you think are too dark:
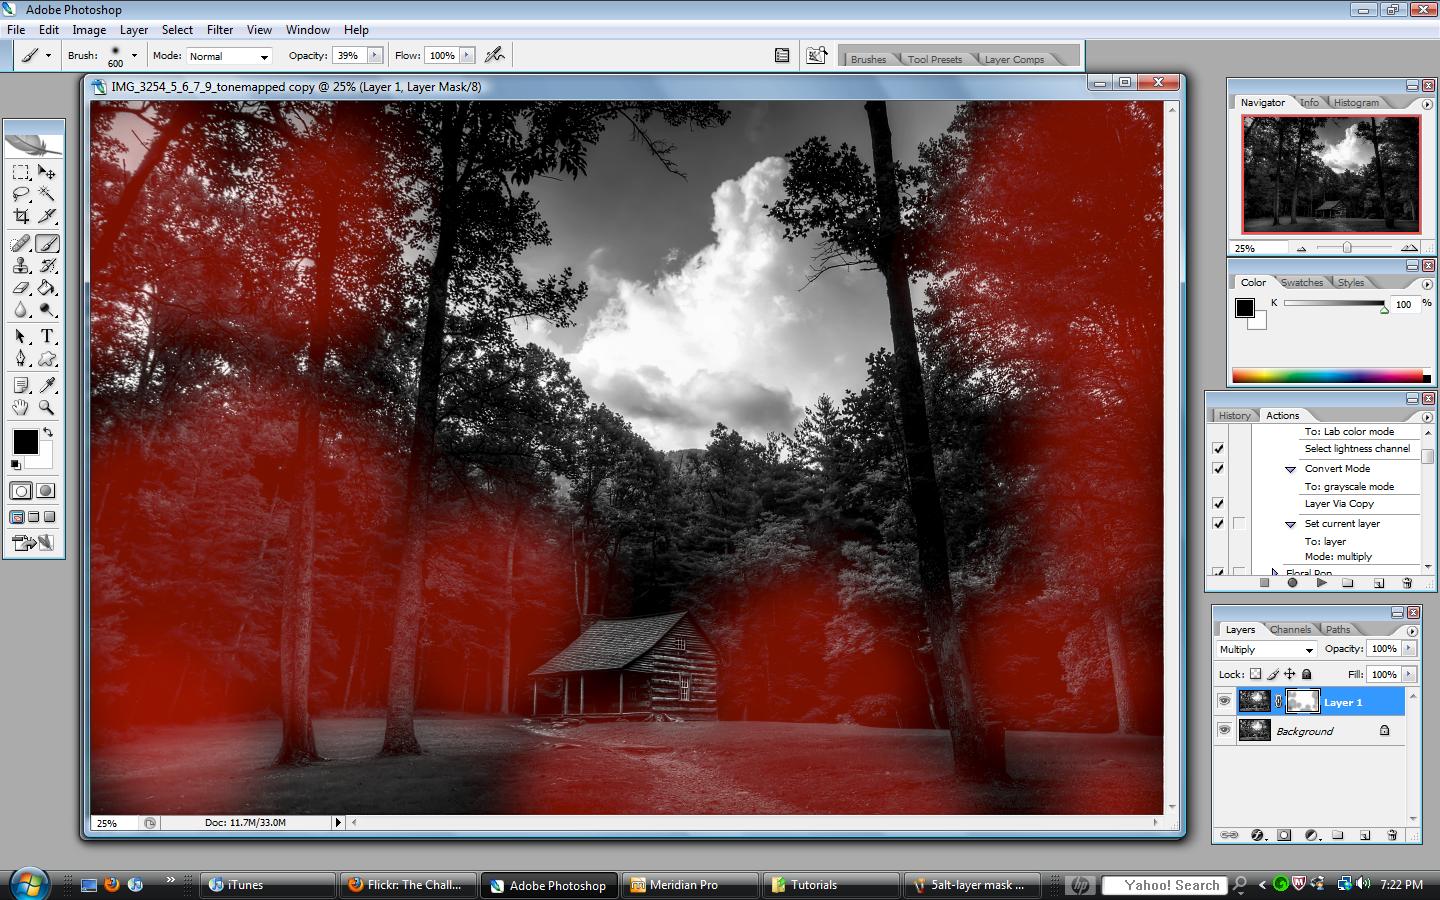 (this image shows where I have painted)
Now, to answer the question that was posed regarding my First Tutorial. If you’ve read that one, you’ve seen that I often layer a black and white image on top of a color HDR image to make it dark and achieve a dramatic look. When I do that, I do not copy the layer and put it in “Multiply” blend mode. After I convert to grayscale, I copy that layer and paste it on top of my color image.
Hope this provides some useful information.
Here are some helpful links for learning more about Photoshop:
Photoshop Support Group
Photoshop Tutorials by Allan Gengler
Actions by Allan Gengler
CoffeeShop Actions

Quick as lightning …
Great tutorial
Thanks Malcom