How I Did It – Part 6
Time for another tutorial!
In this post I’ll show you everything I did to turn this:

Really not that different is it? But I actually spent a lot of time on those “minor” changes.
This is an HDR, so that means I started out with 3 separate exposures by bracketing the camera at (-2, 0, +2). Here are the 3 exposures:
 -2
-2
First thing to do is open these 3 RAW images into Photomatix. I use Photomatix for all of my HDR’s. If you are interested in buying Photomatix, use the coupon code “malcolmphoto” for a 15% discount! It’s already at a great price ($99) and even better with the discount.

Once Photomatix has finished processing, I’ll tonemap it using the “Details Enhancer” option

(just noticed my screen grab cuts off the top of the settings, the two that are cut off are Strength @ 100, and Saturation @ 82)
Now we head to Photoshop…

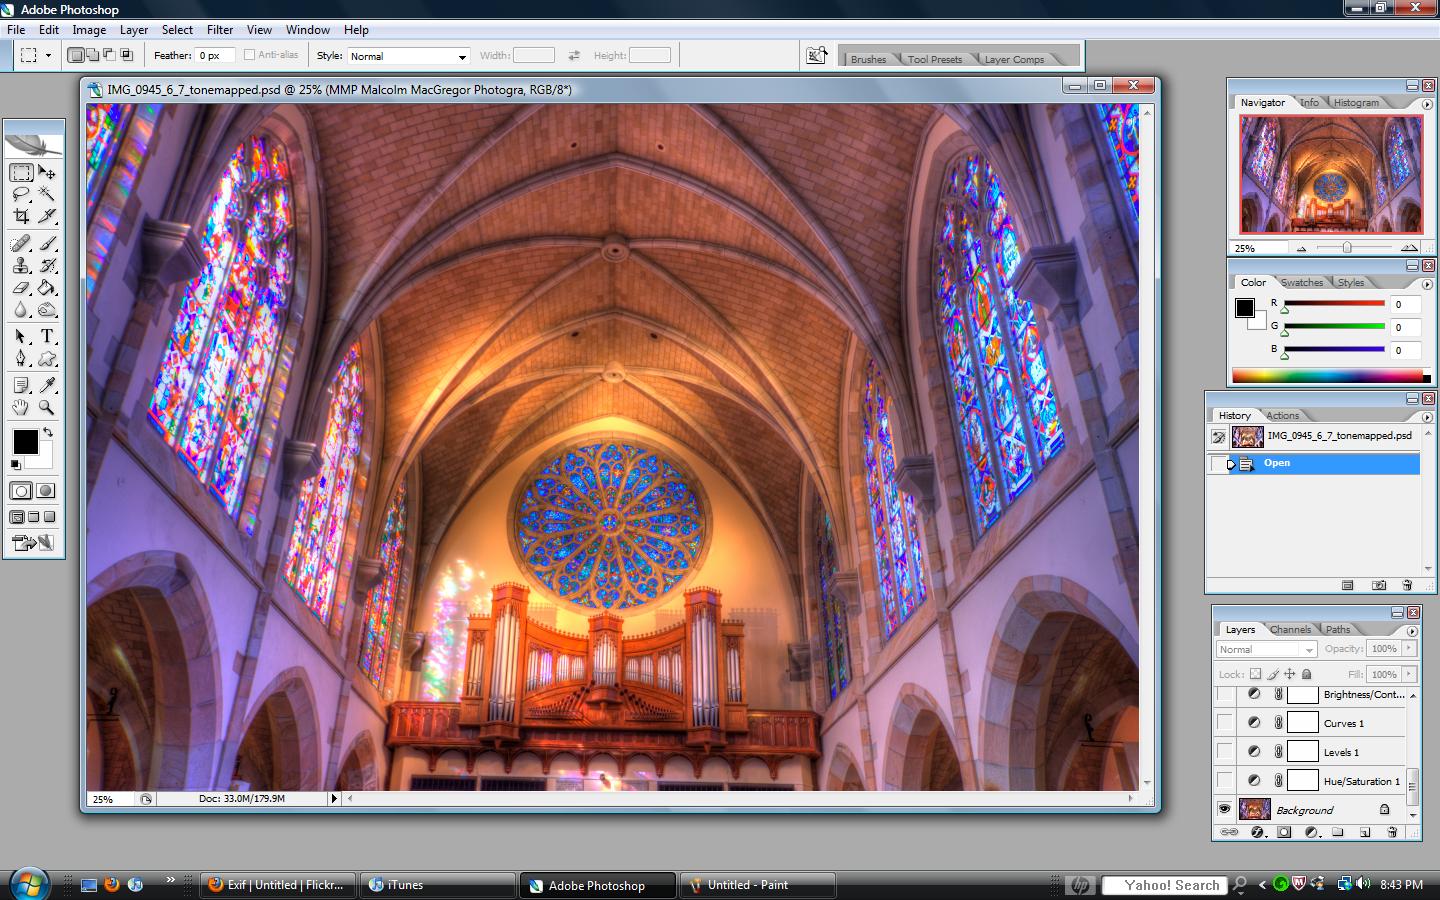
So here we are, and the first thing I want to do is get rid of all that yellow. I thought I liked the saturation levels in Photomatix, but changed my mind – so I open a saturation adjustment layer and decreased the overall saturation quite a bit:

Next I open a Levels adjustment layer:
 Here I clicked and dragged the little black triangle on the left in until the “mountain” started. I also wanted to lighten the image some, so I slid the gray triangle to the left some.
Next I add a typical Curves adjustment layer to slightly increase contrast:

There are so many different ways to do the same thing in photoshop. I was really trying to lighten this image so I did a Brightness/Contrast adjustment layer. I increased both amounts a little. This really has a similar affect on the image as a curves adjustment or a layers adjustment.

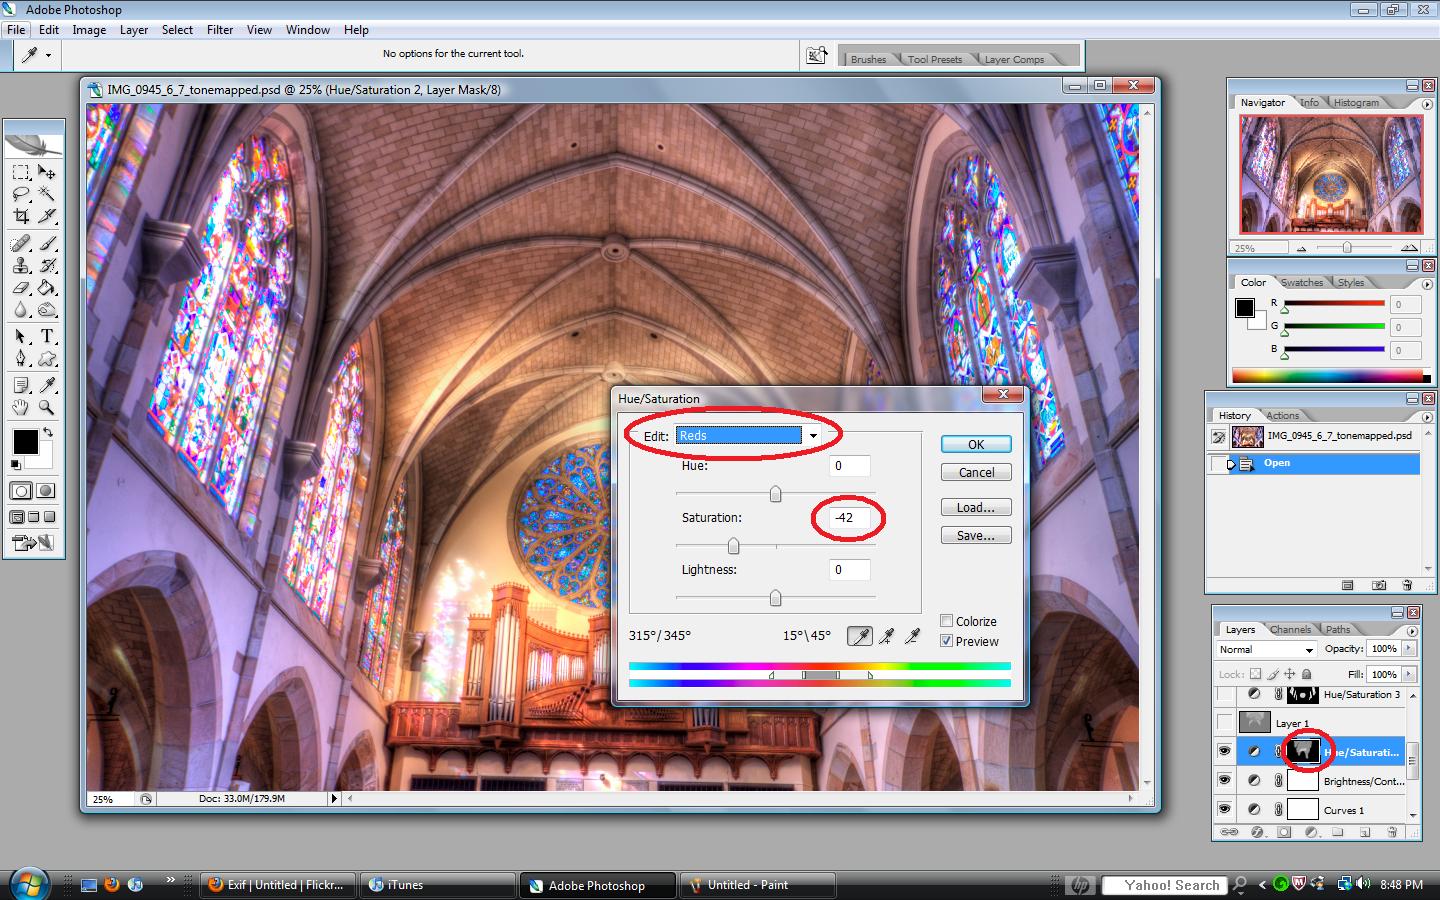
Now, I still was not happy with all the yellow in the ceiling so I opened another saturation adjustment layer:
 Notice that I used the drop down menu and selected “Reds” – this will desaturate only the reds in the image. I also desaturated the yellows by the same amount (not shown). Also notice that I didn’t want to desaturate all of the image. So after I made the adjustment, I filled the layer mask with black. I then grabbed a soft, white, low opacity brush and “painted” white back on the layer mask over the areas that I wanted desaturated.
Next, I still wanted the image brighter in some parts so I opened a new layer and filled it with 50% gray. Once you do that, put the layer in “Overlay” blend mode. You’ll see that the gray “disappears”. Now, grab a very low opacity (for this I usually set it to less than 10%) and paint on the layer with white or black. White being areas that you want to lighten and black being areas that you want to darken.

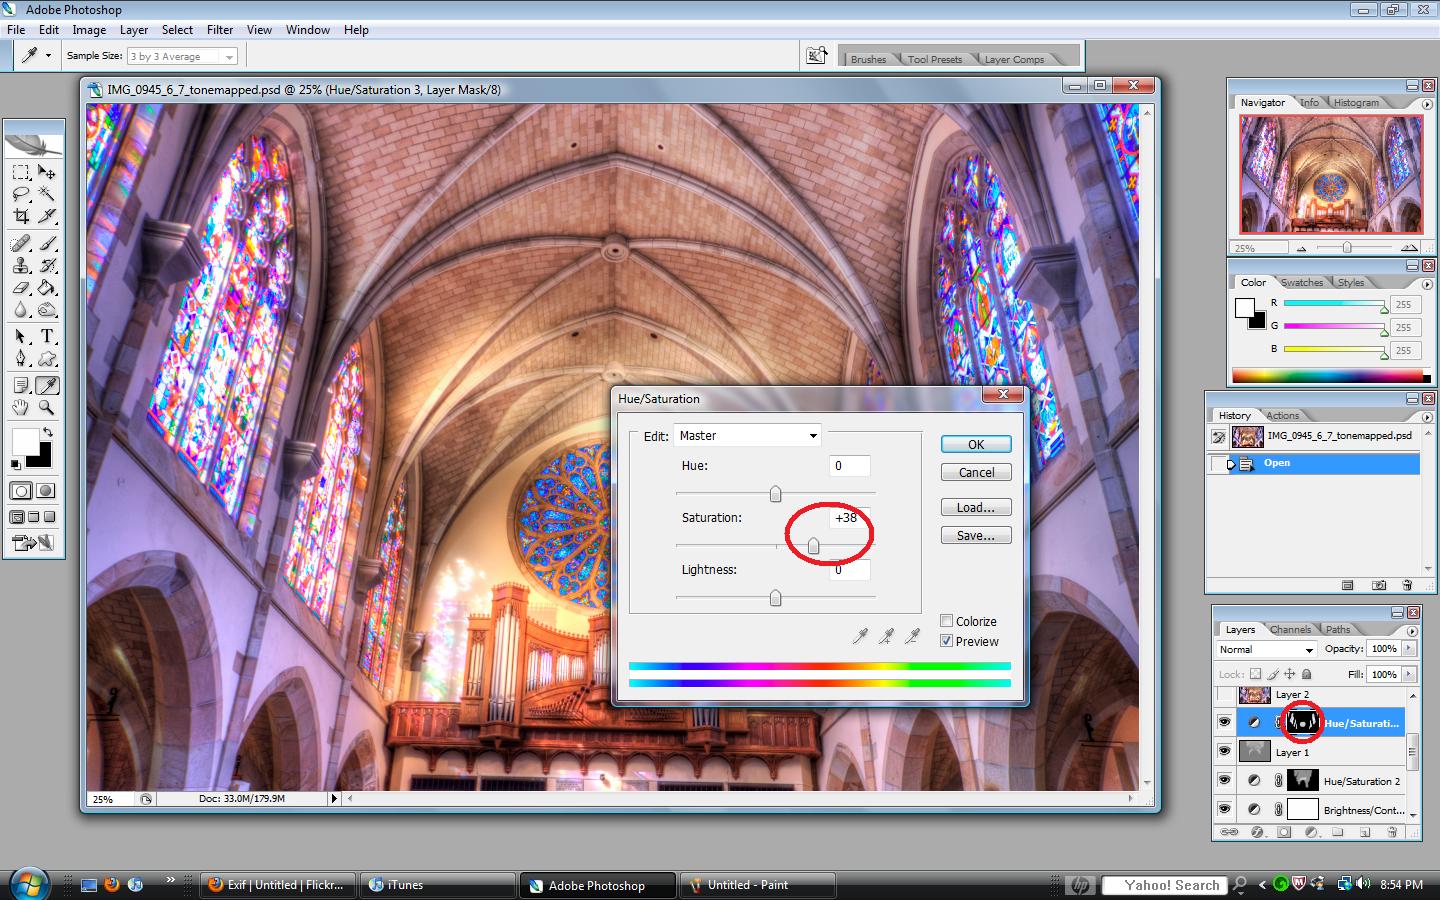
Next I wanted to increase saturation to enhance the stain glass windows. So, open a saturation adjustment layer and slide the saturation to the right. Fill the layer mask with black and paint over the windows with white (making sure you are painting on the layer mask).

Now I want to straighten it by going to Filter, Lens corrections:

Now it’s looking better!
Only a few things left. The next thing I did was run a noise reduction filter. I use a plug in from Imagenomic

And finally I sharpen using Filter, sharpen, unsharpen mask:

And that’s it!
Here is the final product
Thanks for looking! I hope you found this helpful. Please ask questions if you have them, I’ll try by best to answer.
See all my other tutorials HERE
I’m on Facebook! Check it out and become a fan!
Remember,
If you want to know “How I Did It” for any photo on my flickr photostream, leave me a comment on this page or send me an email. I’ll be glad to make it my next “How I Did It” entry!
Also, as I mentioned in my first How I did It post, here are some helpful links for learning more about HDR:
Stuck in Customs
HDR Exposed
HDR (a flickr group)
Tutorial Collection at My First HDR flickr group
Helpful links for learning more about Photoshop:
Photoshop Support Group
Photoshop Tutorials by Allan Gengler
Actions by Allan Gengler
CoffeeShop Actions


